Share This Article
In this MailChimp guide we will learn how to configure basic campaign parameters, as well as how to analyse the important data.
MailChimp is a perfect tool to help us manage the main activities of email marketing effectively: designing electronic bulletins, sending bulk e-mailings and analysing performance.
In this introductory post we’ll learn how to configure the basic parameters of campaigns with MailChimp, as well as the data that you’ll need to look at when analysing how they have performed.
Email layout with MailChimp
The first thing we need to know is that with MailChimp we can model our newsletters in three ways: manually, automatically or through a pre-designed template. Let’s look at the differences:
- Manually: by creating a design with Photoshop. This design must be adapted to HTML code so that the different mail managers can read their contents.
- Automatically: Using the templates that MailChimp provides for the layout of newsletters. If your knowledge about design and HTML layout is not great, we recommend using this second option for your email marketing strategy.
- Using pre-designed templates: through platforms or sites like ThemeForest, where we can find a multitude of pre-designed templates, adapted to MailChimp.
We can create fully-customised templates with MailChimp that are adapted to our needs, as well as use all kinds of elements: images, texts, insert links to social networks, videos and GIFs. These templates can also be adapted perfectly to all types of mobile devices, so we need not worry about problems with unresponsiveness, as they already set up for this purpose.
The steps to layout a newsletter with MailChimp are:
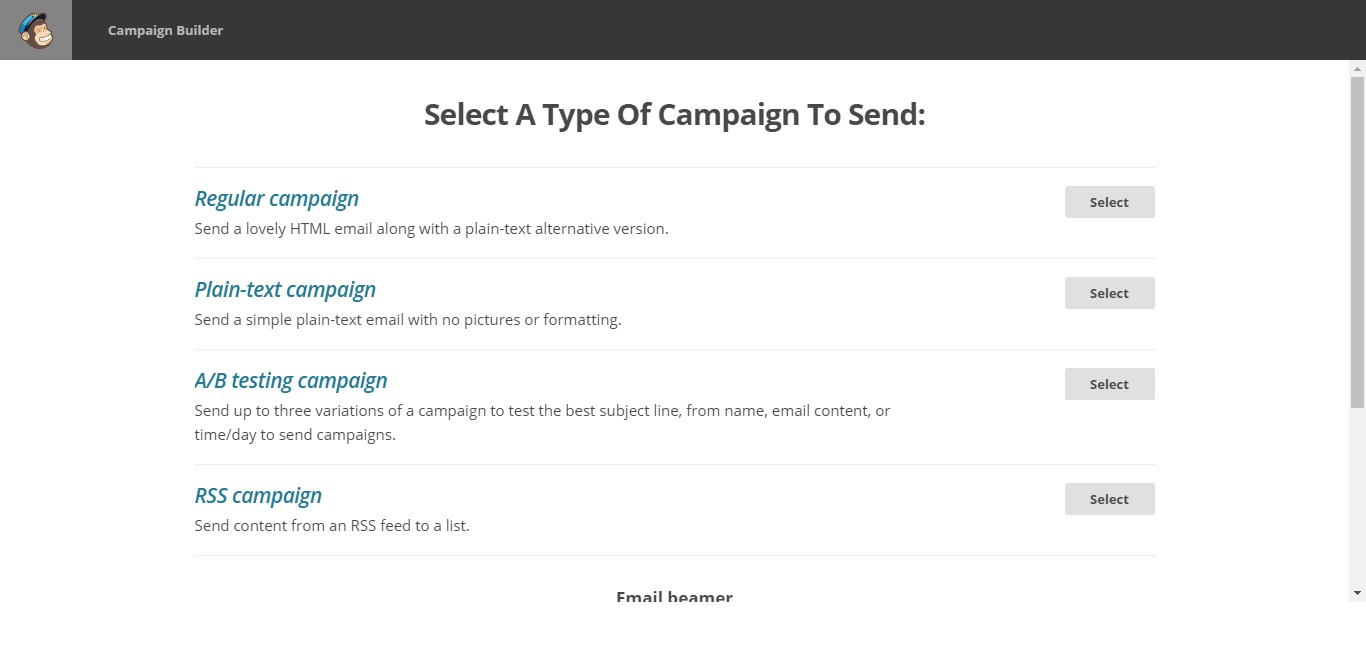
1. Select the type of campaign you want to send
There are four types of campaign but there are two that may interest you more, due to their particular characteristics and projected results:
- Normal campaign: a campaign modelled with MailChimp’s tools and based on HTML.
- A/B testing campaign: with this type of campaign we’ll send very similar emails but will change some details (like the colour of a button or CTA, the copy that accompanies an image, or whether we put in the price of an item or not). The idea is to change only one element each time, so that we can objectively analyse what design is working best. Sometimes, with something as simple as a CTA being on one side or another, the results of the emailing campaign can vary considerably.
2. Choose the list of recipients
It is very important to fill in all the fields well, and then to get a good report on the campaign. First we choose the list to indicate who we want to send the newsletter to. These listings can be filtered in a number of ways.
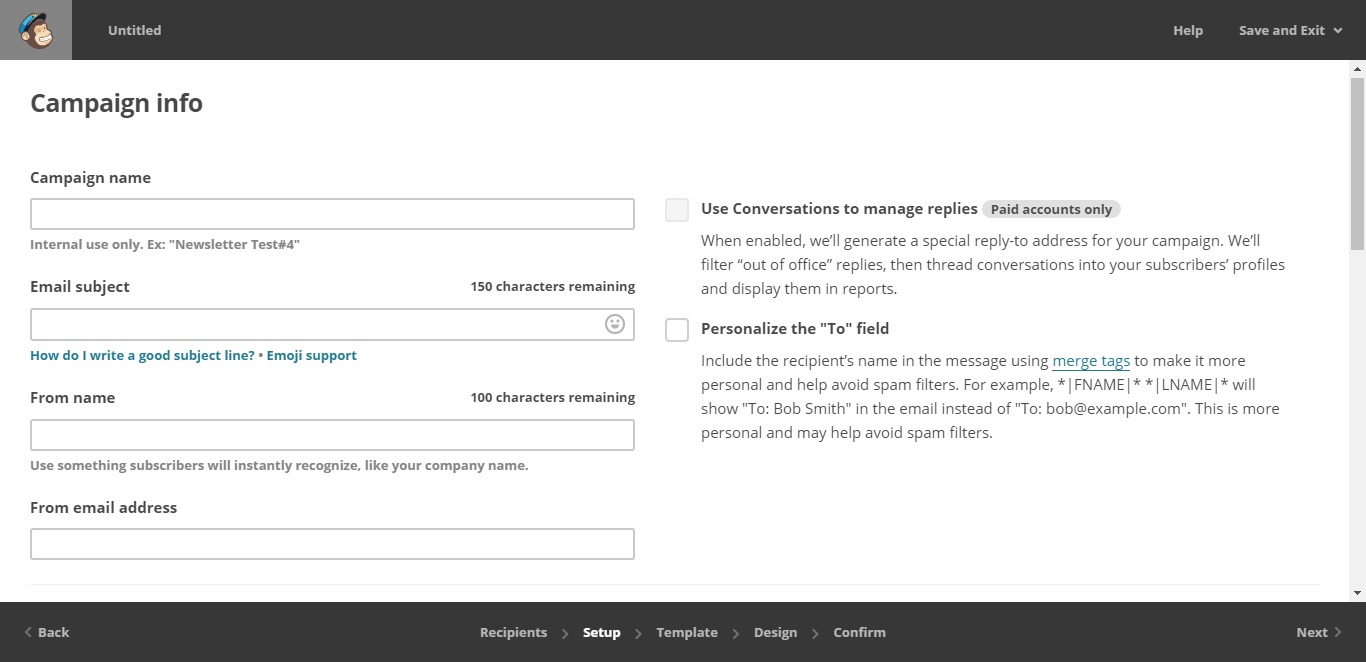
3. Fill in the basic information for the MailChimp campaign
It is very important to then fill in the four fields that we see in the image, although the two most important are the following:
- Email subject: in an article on how to create an effective email, we discussed the keys to choosing the best possible subject line.
- Sender’s name: the originator’s identity must be real in the emails that you send. This and other useful information can also be found in our article with tips on getting your emails to arrive in the email box of your intended recipients.
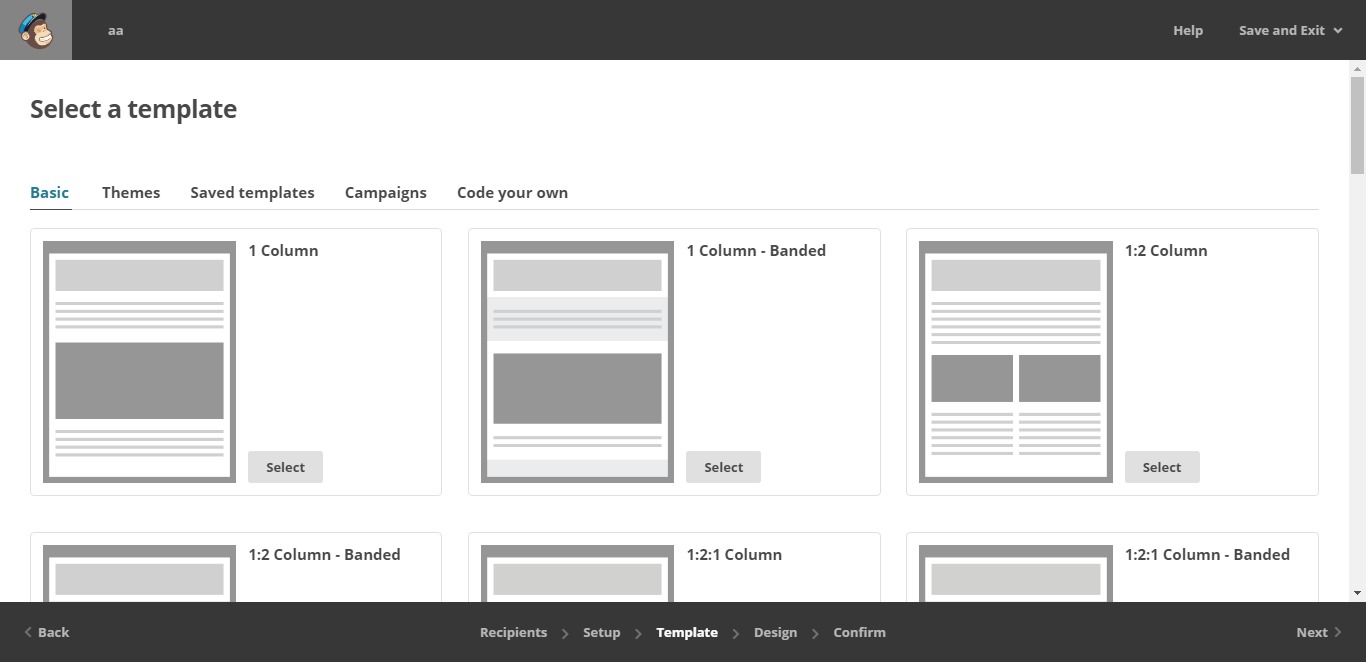
4. Select email template style
Although later it can be modified without any problems, it is important to select a standard template that can then be adjusted to our needs. The grey boxes can be headers or images, and the lines correspond to the texts.
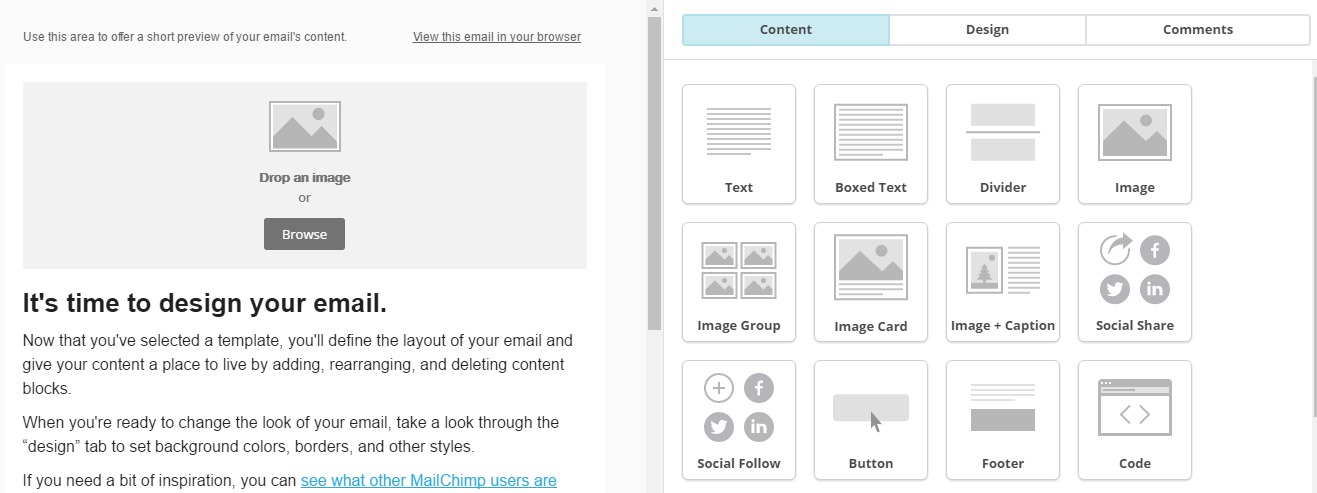
5. Email layout with MailChimp
This tool allows us to view the newsletters as if we were the recipient. We can additionally do a test sending of the emails we want and preview how they are going to look before we send them. Note that in the upper header are two default phrases: the one on the left (“Use this area to offer a short preview of your email’s content”) you’ll have to change and add a phrase that summarises your mailing; and the second (“View this email in your browser,”) should also be modified and translated into the appropriate language, in cases where your submission is not in English.
The editing and layout is very simple, consisting only of dragging the modules from the right to the space you want them to appear in. You can edit, delete or duplicate them once added to the email. Each type of module offers you different options, but they are all very intuitive and it won’t be difficult for you to get used to this design system.
6. Finalise and send
We are approaching the final step of this MailChimp guide. You can do the mailing at any time once the layout is finished, or schedule it to launch on the day and time that suits you best. It is advisable to send a test before you do the definitive mailing, and remember that if you decide to send the mail later, you’ll be able to edit it at any time prior to sending.
7. Performance analysis of emails with MailChimp
One of the great advantages of email marketing tools like MailChimp is that it allows you to analyse the performance of the campaigns quite deeply.
In the “Reports” section we can analyse several metrics that will help us to optimise our future campaigns, once we get to know our recipients better. We can see the opening rate of email sent, the time when users have opened it, how many times each user has looked at it, the rebound rate, the parts of the newsletter that have been clicked on, and so on.
Some of the most important metrics to analyse are the following:
- Un-subscriptions: the number of people who unsubscribed from your mailing list after you’ve sent them email. If there are a lot of people who have unsubscribed, you should ask yourself if you are doing the mailings correctly. Perhaps the content was not interesting, or the database you sent it to, was not well segmented.
- Bounces: occur when an email cannot be delivered to an email address, either because they are invalid or due to unexpected errors during sending.
- Openings: allows us to see what percentage and the number of receivers of our mail who have opened them. At this point, an attractive email subject line plays an important role.
- Clicks: shows us who clicked on one of the links we included, out of all the subscribers who opened our newsletter.
- Heat maps: are used to analyse where the newsletter has been clicked and to find out which are the “hot spots” on our emails.
- Google Analytics: MailChimp can be linked to Google Analytics to carry out an analysis of the campaigns, as well as to track the conversions that are achieved through your email marketing actions.
We hope that this short MailChimp guide has helped you to start exploring the exciting world of email marketing. Our main advice is that you start practicing and always analyse the results you get.


 Contact


