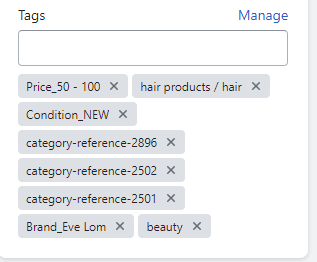
As noted in the Shopify article “Create and use tags in Shopify,” tags are very useful for grouping, organising, or filtering products within the store.
In this Academy, we are going to see how to create the tags correctly so that the Multi-Channel (MIP) does not overwrite them during updates.
1. What tags are for in Shopify
Although customers will not be able to see the tags, they are very useful, since the search function of the Shopify online store uses them to classify the products and also to organise the search results.
You can use these tags to group products and perform collective actions on them. For example, you can add the Summer tag to all products related to this topic, even though they are not part of the same category in our catalogue.
2. How to create tags
If you want to create tags for products in Shopify, go to Products and select one to open its details.
In the Tags section, enter the name of the tag you want. Note that, for synchronisation with Bigbuy to work properly and for the system to respect the tags in the updates without deleting them, they must be created in the following format: :Mother’s Day.
3. How to view products by tag
To see all the products associated with a tag that we have created we must do it in a url with the following format:
If instead of having created a tag within a collection, we have created it generically for the entire store – that is, if we have given tags to products from different collections . To see all the associated products, we must do it with a URL in the following format:
- https://domain-store.com/collections/all/tag-name
Examples:
- https://domain-store.com/collections/glass-bead/screw
- https://domain-store.com/collections/all/screw
If you need more information about other Shopify features that help get the most out of tags, we invite you to read the article Create and use tags in Shopify.


 Contact


